Tuesday, October 25, 2016

Sewing up-cycling

I find a lot of my clothing off the rack just doesn't fit very well. Or after they get holes or stains or shrink I still try to work around the issues by "up-cycling" them into some thing new. Here are some of my repairs and re-workings.


This went from a nice pair of jeans, 
into a ripped up pair of jeans,
into a patched knees pair of jeans, 
into a pair of Bermuda shorts, 
and then into a pair of cut offs. 
Above shows the idea of using some old 
t-shirts and making some binding
 around the hem and the 
patch pockets.

I don't usually like the frayed edges on my jeans.
It becomes necessary to find a solution. Binding!!!
It fit in the store. But then I washed it.
This shirt sleeves were too short, and it was too short
as they always are on my long torso.
I usually figure they shrink after my first
wash, so I look for the larger size. However,
I couldn't find the larger size,
but figured, I could suffer with short
sleeves. Well, I couldn't. 
I opened up the faux henley button placket
and added two inches of ribbed knit from an
old tank top, to the sleeves and the hem. I added
a little insert to the neckline
to cover my bust. I re-attached
the sleeve tabs and sewed on white contrast buttons
to flank the insert at the neckline.
Same issues as before. The sleeves were too short
the shirt was too short after washing.
I didn't have any fabric or old
t-shirts that would have worked with this shirt.
So I went and found some very cute
printed jersey.

I love my dress-form. It's always nice to work on
a dress-form. Good old Sea-wolf.
I got one that was as close to my
actual measurements as possible
so I could sew for myself. 

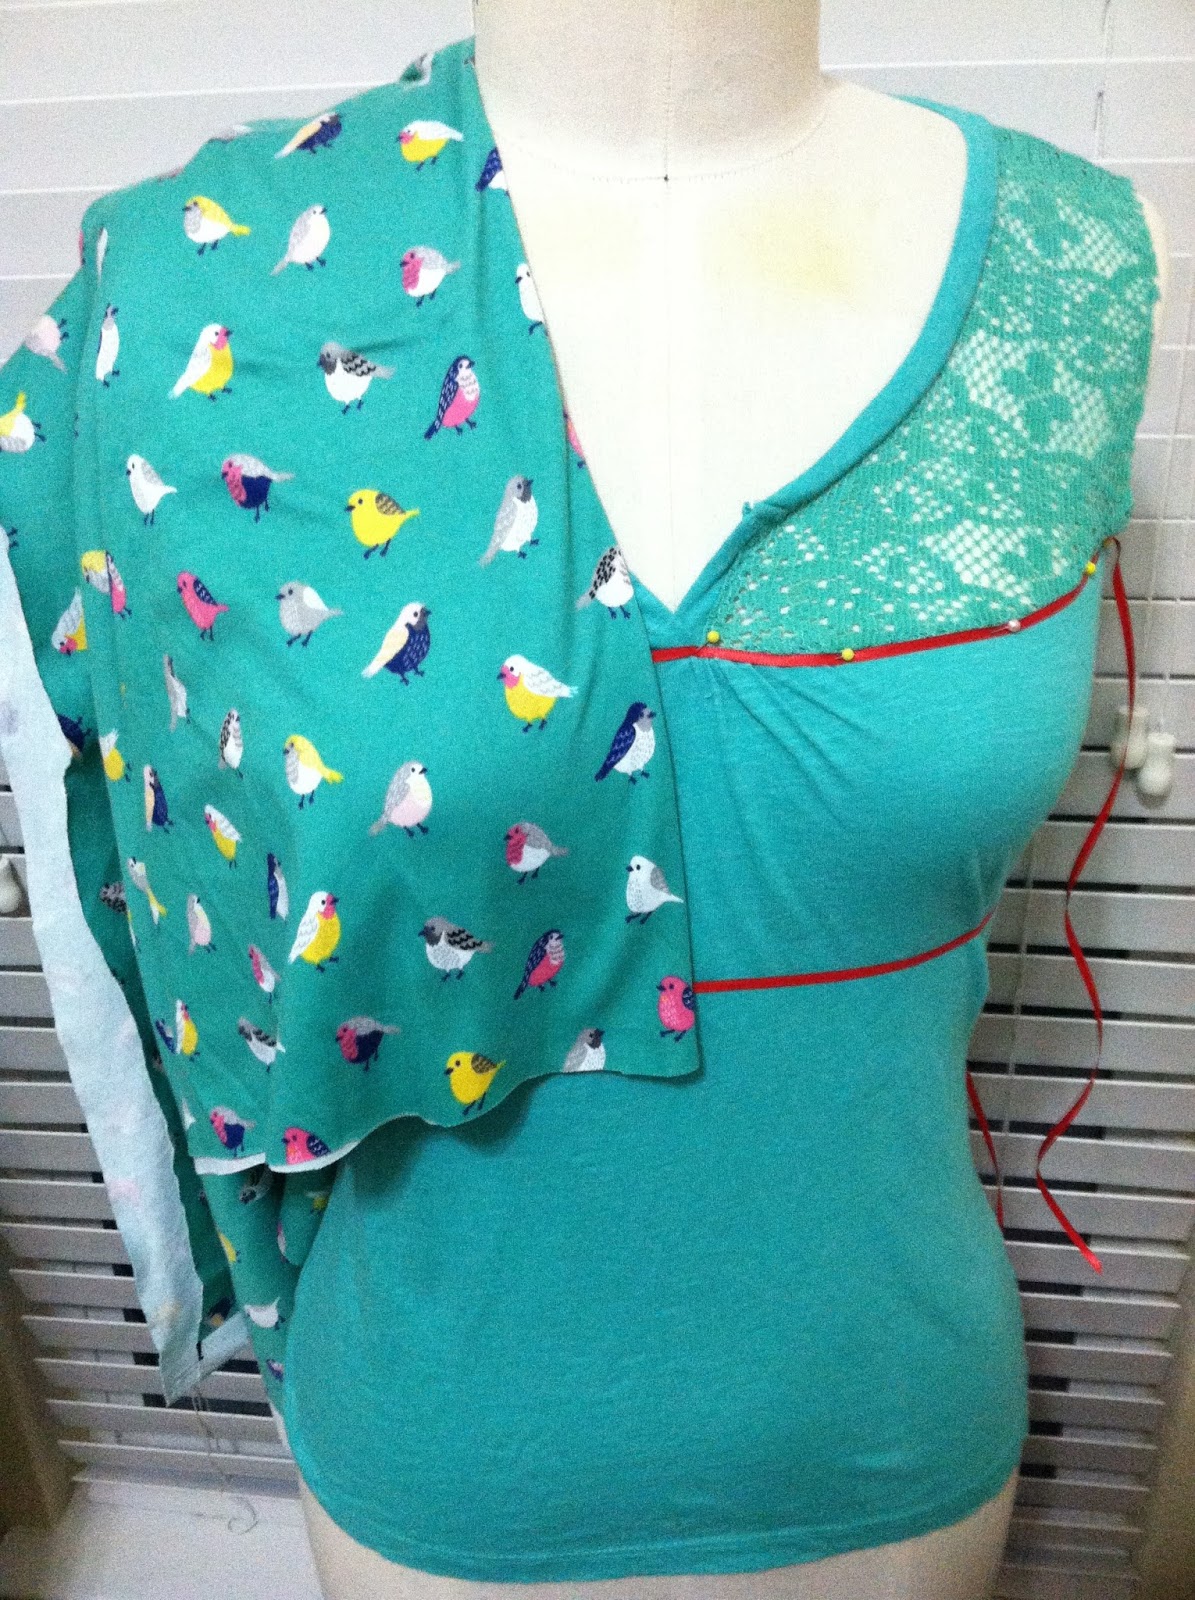
Super cute printed jersey that matched
the color.

In progress

Draped on my dress form.

I changed out the body fabric to the
new print. Added the extra fabric on the hem.

And changed the short cap sleeves
to a flutter sleeve. 

So much stretching while
I was sewing. (I"m such a naughty girl)
Again, use a ball point needle.
Use the correct stitches for knits.
Or use a serger. 

Knit stay tape (water soluble) is a great thing.
On this project I couldn't make a longer sleeve
work. So I just make a flutter sleeve. It's not tight
on my bicep, or deltoid muscle, which is nice.
But even tho the sleeve is still short,
I don't mind it as much since
it's not so tight on my upper arm.

$3 shirt from Walmart Clearance.
Again, too tight on upper arms and too short.
I know, just buy a larger size Ruth!!!And yes, I usually do!!
However, they didn't have a larger size
available. And I loved the stripes.
$3 was ok with me.

Of course, even tho
I buy the large, they are too large in the
waist. I usually buy the large,
and then if it's too big in
waist (even tho it fits my bust and arms)
I'll just do a quick stitch down the sides
about 3/4" to take in.


So, I lengthened the sleeves
by unstitching the hem. And
added a small godet to the
side seams.

I hemmed the sleeves and hem
at only 1/4" instead of the 3/4"
that it came with. Lengthened it
a 1/2". I found a cute printed
fabric that matched the colors
perfectly. The stripes don't match up
on the right side, but they did on the
left!!! So, half success. 


Inside of shirt.
This shirt was pulling uncomfortably
in the bust.
So the side godet added a bit of room for
me to feel more comfortable.
It also loosened
the sleeve since they are usually too
tight on my arm. 

Inside of godet. 

Cute tank, with adorable embellishment.
However, I never wear tanks without
a cardigan since I burn so badly in the
sun. You never saw the hummingbird
when I did that! 

Just a comfy green t-shirt that matched
the hummingbird.


I thought I could re-use the embellishment
on a shirt I would wear more often.

I cut my t-shirt 1/2" below the arm.

When sewn, I noticed the embellishment
was at an add spot on the bust. 

Too low on the the bust. But since I didn't
want to change the armhole I decided to raise
the shirt by the shoulder seam.
And change the neckline.

New Neckline.

Tried to use old hem as neckline.

I used an elastic for the neck after all.
I made it a petal sleeve.


I like it!!!

Anyway, Cheers!!

Ruth

Tuesday, October 18, 2016

T-shirt quilt made for $10


T-shirt Quilts


Many people have a slew of old T-shirts that they no longer wear, but cannot bear to get rid of. I know I have many. Some have holes, some have stains that will not come out. Some are too small, or some never fit but the logo is a favorite. I myself am wearing a t-shirt I bought sometime in either 2001 or 2002 from a Beck Concert. I've repaired holes and loved it to pieces. I have many I cannot get rid of just because they hold memories. Or rather, a lot I cant wear because of armpit stains (I know, gross right?) Anyway, you've probably heard of T-shirt quilts. Take some t-shirts no longer wearable, cut out the important parts, and make a quilt. It's what quilts have been all along. Good bits of material that need to be re-purposed. So my brother in law has a bunch of t-shirts that he wanted made into a t-shirt quilt. This would be the second t-shirt quilt he had made. I didn't make the first one but did supervise. After cutting out the important bits, we fused interfacing on the backs of the t-shirt to stabilize it. That way there's no stretching that's inherent to knits. It made it easier to sew next to woven sashing. 

Now many like the sashed and perfect style of t-shirt quilt. Like these....


Well, for this quilt, I wanted to skip the interfacing and the woven fabric and only use the t-shirt material. 

So, after cutting out all the important bits, (and asking C if those were the best parts- he removed the ones he didn't want) I started to  cut bigger pieces of useable t-shirt material from the existing t-shirts. 

I avoided the stains, the holes, and other dingy pieces. But there were so many large swatches of just plain jersey that I was able to use no bought or new materials for this quilt top. Score right? I was going to fuse a lightweight knitted fusible interfacing, but thought, hey, its a knit to a knit, I bet if I am careful, and use the proper stitches and needles it will be fine. (We will get back to that later.) 


I do a more "improvisational" style of quilting. I put the pieces in a way I feel is pleasing. Add in swatches to fit. Then sew them together. I still work in a strip method tho. 
Above is my beginning. My project board is a 8'x4' foam core insulation board from Lowes. (it's only $11.98) I just added some batting and then some felt fabric. I stapled it to the back, but it pulled the staples out, then I just used duct tape. The fabric swatches just stick to the flannel. If it's heavy, then I can add a straight pin to hold it more firmly. I used a 3/4" thick on mine and it's perfection. My knees and back cannot handle working on the floor anymore. Plus, it's incredibly lightweight so i can move it where-ever, and just lean it against the wall. 
This is my layout. I just kind've place the blocks of logo I cut from the t-shirt on to the board in strips. I have 5 strips above. It may not look like it but I do. Next I add some pieces to fill out the strips. I take the other strips I cut from the old t-shirts and start filling in make the smaller logo blocks larger to fit the height of the largest block. On the top strip, I was adding pieces to the smaller logo blocks to match the size of the large blue Texas State block.


On the following strips, I just added blocks to the smaller logo blocks until they were the same height of the largest logo block. So, I guess my method is match the height of the largest block, then after all the blocks have been matched to the height of the largest block per strip. Then started filling out in between the blocks to match the length of the strips you would like. 

Above you can see I'm trying to add filler strips in between the blocks of each strip to match the first width.  This is where you use more of the pieces of t-shirt you cannibalized from the original t-shirts where you found the logo's. My problem was my knits were stretching. Which I knew would happen since I didn't use interfacing. Don't make my mistake. It's not fun to have to go back and re-sew strips and add pieces because one strip stretched making one side of the quilt about 6 inches longer than the other. 

On this part you don't have to use just strips. You can make more patches, stripes, whatever. It doesn't have to be perfect. Because it's a mess to begin with. Just remember, it doesn't have to look perfect, but the weirdness and funky-ness has to look INTENTIONAL. 

 Here I"m adding strips between the large strips to add more size to the quilt. If I had just used it as is, it would have been a crib size. 


So, this is the finished (almost) quilt top. Notice anything? Yeah, the last few strips stretched horrifically. So the left size is about 7" wider than the right side. So....note to self, USE INTERFACING.

I had to go back and take in quite a bit. But because this was the last stretch, and I was tired. I didn't take it apart. I just sewed in some little darts to the larges pieces. It's still uneven. Just not as much. Maybe only 3" or so different from the top of the quilt to the bottom. 

The back of the quilt
after a bit of re-working to fix the size.


I then grabbed a twin size jersey flat sheet that I hadn't used in awhile and tried to measure it with the quilt top. I leave about 3 inches extra on each side of the quilt backing to use as a binding. Then I grabbed my fusible batting ($10 with my joann's coupon) and sandwiched the quilt top, the batting and the quilt backing together. It's fusible batting and it takes quite a bit of ironing. (use a pressing cloth between some of the t-shirt screen prints and logos because depending on how it was made, the paint and ink can come off on your iron, and destroy the logo in the process. )

Quick note: If you want to make a quilt more cheaply, a flat sheet in the size you want the quilt (twin/full/queen) makes an easy and cheap quilt backing that you don't have to piece together. (fabric by the yard usually comes in 45"-55" widths. The backing of a  quilt will need to be bigger than those widths which is where the piecing comes in. I had a flat sheet on hand. If you don't, you can usually find one for cheaper than the fabric by the yard.  

I then used some basting safety pins to add extra security and was ready to quilt.

I just used a straight stitch in the ditch method in-between the larger strips and was pretty pleased. It sure felt pretty comfy.


I used the left over backing as the binding and after finishing the corners was finally finished.


The great thing about this quilt is I only bought one piece. The $10 batting. The whole quilt top, was made entirely from the t-shirts my brother in law gave me. I used the hems, the sleeves, the backs. The only thing i didn't use were the necklines (except for one). I used an old jersey flat sheet that I no longer used but needed to hold on since it was a nice huge piece of fabric. So, if you have some extra fabric lying around.....sometimes it's a useful stash. IF you tend to re-use fabric. I re-use my old jeans to make patches on holes in my other jeans. I re-use old t-shirts to make quilts. I re-use old curtains, or pillowcases for a variety of projects. Some times for dresses (like the sound of music!!!) And sometime's its just strips I use to work on my stitches, or practice with my tensions. So, re-cycled fabric is pretty useful. At least it is to me. 


It's not a perfect quilt. It's pretty messy. But it's finished. Which is my favorite kind of project.


,Rudy