Showing posts with label recycled shirt project. Show all posts

Monday, March 18, 2013

DIY maternity nursing shirt

I have been on the prowl for an easy shirt to wear for nursing. Most of them come with a higher price tag and if I'm going to be covered in spit up and milk stains, I just don't want to invest in something expensive. So I looked online for DIY nursing shirts and didn't come out with much that I liked. I mean, I don't plan on wearing them out much, but I have to look "decent" if I do go out in one. So I grabbed a 4 pack of XL men's Hane's T-shirts and started draping on my size 12 dressform. Unfortunately for me, I am no longer a size 12, I  am much larger due to my need to consume all the food I see, and having been pregnant about 4 months ago, it's just going to stay that way for.....hmn, eternity I guess.

I came up with a process to make a presentable t-shirt cheaply, that works as a nursing top.
You will need a t-shirt that's too big for you, a sewing maching (I used a serger) and scissors.


First start with your XL men's t-shirt. Or if you are a smaller person, a smaller shirt. But we will be taking in a bit so guesstimate. My measurements are:
Bust: 38"
Waist: 33"
Hips: 39"
When finished my shirt has a good 4" ease for comfort. I had made one tighter, but didn't like that you could see my doughboy tummy.

XL Men's T-shirt, nice and roomy

I measured 3" down from the armpit seam


Cut 3" down from armpit seam

Cut down center front

Fold over sides of cut center front and make a diagonal line

Cut along the diagonal line and make a V

Overlap the two center front corners


My overlap was 8", you can try on the shirt and find the most comfortable overlap for yourself

Pin your overlap


Baste or serve the overlap only


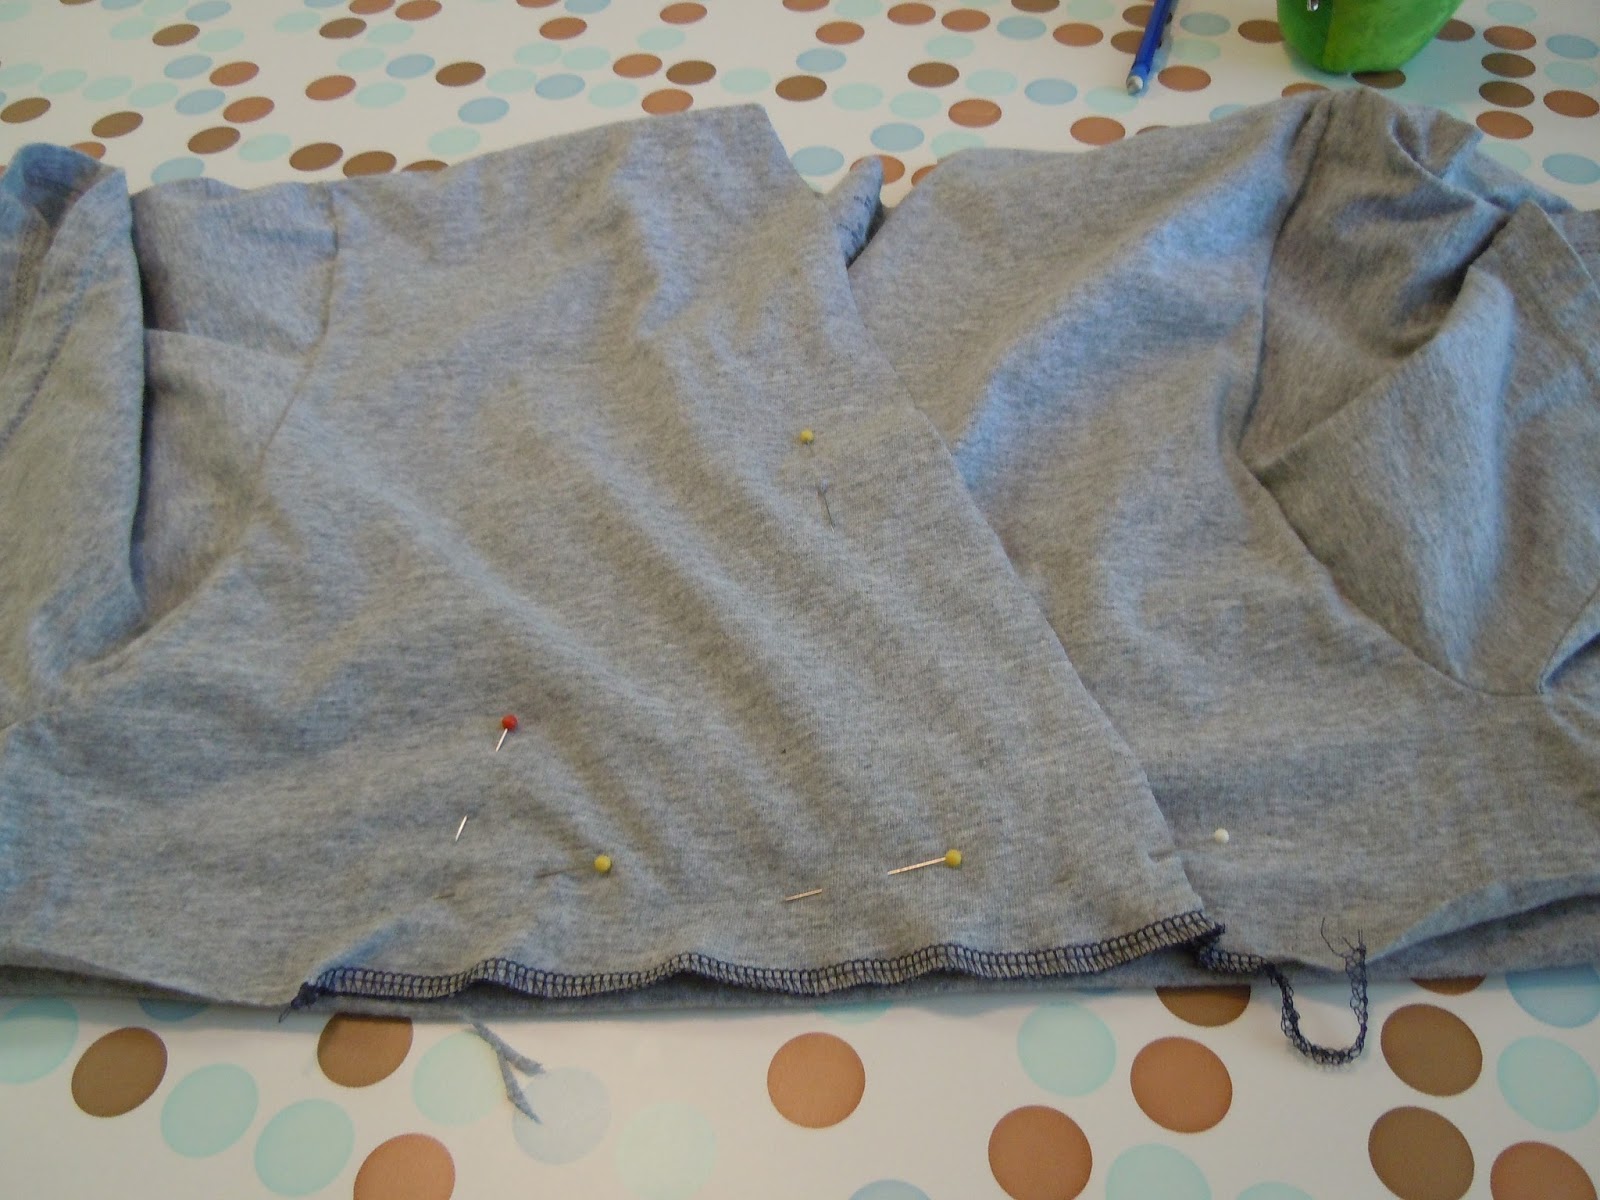
Keep the overlap pinned even after sewing-cut open the center back-straight down the middle
Take the bottom half of the shirt and cut a straight line

pin the top of the overlapped shirt, and the bottom


Serge a straight line attaching the two pieces

There will be extra fabric at the center back, you can cut it to match the center back top and then ease it to 0" for a A shape, or cut straight down for a fitted shape.
Serge or sew the center back seam. Before you sew, try it on and pin the fit you want then mark. This is what the back should look like.

This is the front of the shirt inside out, with my son, because he desperately wanted to be in the picture.


This is the finished shirt, I took in a bit more ease for the picture, I wear mine larger than shown. No need to hem the neckline, it's a jersey so it just rolls nicely, and no frays.

Pull one part to the side and easy nursing, just remember, this is a jersey fabric, it will stretch so the neckline will get looser each time you nurse until you wash it again. So if you want to reinforce it with an elastic that would help.

Hope this works for anyone wanting an easy and cheap solution for a nursing Tshirt.

I'm wearing the one I made in the photo's right now.

Salut....

Tuesday, April 10, 2012

Too small blouse transformation

I had come across a lovely grey and pink blouse at Kohls last week on the clearance rack. It was from their Elle collection. As much as I loved the style and the priced (marked down to $12.00) the size 2 is way too small for my more robust figure. It was the only one there and searching for a bigger size didn't help since it was the only one in the store.

I went back and forth on buying it, knowing it would take a bit of time to "fix" it to fit me. The seam allowances were only 1/4" and were serged so letting it out was impossible. So finally, after putting it back and picking it back up again I decided to embark on a Too small blouse transformation. Of course, in my haste to get it done in time for easter I forgot to take a picture of it before I transformed it.

So, I drew out a sketch of what the original style was.

It's not my best flat sketch but it's been awhile.

I found some very old salmon pink shantung (like may 25 years old) that I have held on to for many many years. It's papery and flimsy but it was all i had that matched. It was shredded in places because I think it may have been treated with a chemical that makes it softer but at the same time degrades it. In any case. I found my fabric and I started visualized how to make it bigger. I settled on cutting down the front and adding shantung panels to enlarge it. I draped the pieces on my ole' Seawolf which says it's a size 12 but is more like a size 10 as far as actual measurements go.

This is my first version but I felt it was lacking something. Onto another version.


The pink looked more "intentional" with the pink
sash but I wasn't quite satisfied.
I almost went with this one but didn't want
to spend much more time handsewing buttons.

I liked the idea of the sash better because:
no hand-sewing necessary.

I eventually went with this one, but altered it a bit.

Here's my final piece, all sewn together.

I sewed the pink and grey sash together. It seemed
easier than my final plan before.

If you are thinking the décolletage is a bit risky well then you didn't know that I had always intended to wear a shirt underneath it. And use the grey blouse as a bit of a light blouse-y jacket. No one was offended by my bosoms. I didn't ever get a picture of me wearing it because I got sick on Easter and took it off immediately after I got to my sisters Easter party and laid down in my sisters bed and watched re-runs of NCIS. I did get a couple pictures of my son picking up Easter eggs and really, that's all I'm required to do and I felt happy.

I did end up doing some hand sewing since the shirt never stayed closed. I put in some hooks and eyes to keep it together under the sash. 

But all in all, a nice piece and I'm glad I did it. 

Ruth

Sunday, March 18, 2012

Turtle-neck into blouse project


I one day tried on a shirt I hadn't worn in awhile. I loved the color  but the size was too big and the fit was just too.....floopy. That's my description. I cannot come up with a work that correctly fits the fit of the shirt so I made one up.

Here it is on my lovely assistant (dress-form) Seawolf.

See what I mean. Floopy.


It had some sort of oil stain on it, even after several washes. And I just didn't have enough hangers. So I opted to donate it. But, I had an idea and decided before I gave it away, I would experiment and see if I could turn my ugly turtleneck into a cute blouse. It's always a toss-up to take a ready made shirt and make it into something else. Especially if that shirt is made from a fine jersey. Knits are hard to work with if you're out of practice.

So I drew out a few designs and here they are.

These are some rough sketches I jotted own in my sketchbook. 

I decided to go with option B. It's the one in the middle.

So, I started to mark out what I wanted with some ribbon. I also cut off the sleeves. 


I marked where I wanted my neckline with tailors chalk.


I then started cutting and pinning to match my sketch.


I had in my sketch cap sleeves and a waist sash. I changed these a bit in the end.

I marked out where I wanted my drawstring waist.

Then I added a drawstring casing and pulled some elastic through it. Then I took my sleeves and folden them twice and stitched them on the arm seam to stay folded. 

I think it turned out pretty well, The only change I plan to make is to cut off the elastic ends and add a self drawstring so It doesn't shout at you so much. 

Here's the sketch I started with....they aren't exact but are similar enough.

But I like both of them and aren't unhappy with starting with one and ending with another. That's one of the hallmark tendencies of mine. I start on one path and work until I'm at a different destination. But hey, that's creativity for you. You have to be flexible sometimes.


Another thing I learned while doing this project. You must be careful and respectful of knits. Especially the fine gauge modal ones. They are a bear to work with. Especially if you don't work with them often. Remember serger's are your friend, and check your feed dogs, tension and stitch so that they are correct for your project.

Ruth