Tuesday, October 11, 2016

Bra's for a Cause

My sister-n-law Kendra, asked me to work on a BRA for "Bra's for a Cause" event sponsored by the Women's Council of Realtors Hill Country division.  It's a charity that helps cancer victims who are undergoing treatment. It raises money for the Pink Heals Organization and the Central Texas Medical Center Cancer Fund. It donates money to help actual people suffering with cancer. They help pay bills, groceries, they pay for treatments in the hospital thru the cancer fund. They give cash to those who need help. It's a great cause that helps real people going thru this struggle. The idea is to have Firemen, strut down the runway, in beautiful lovingly designed bras, and then auction of the bra. It's a great and fun time, and I designed the bra that Independence Title Company was sponsoring. Each bra was done in support and in memory of a person going thru breast/reproductive and other cancers in the Hill country Area. 

Here's some pictures of the last years Bra's for a Cause event.


I mean, I really had to step up my game to complete with the awesome creations that had been made. The person that was being sponsored was Ruth, a lovely lady who had gone thru breast cancer treatment 15 years ago, and now again is going through another after being in remission for so many years. She is a lovely woman, who was a hard worker, a constant positive person, and a fantastic Poker Player. The idea was the have a Poker themed bra. K handed me four stacks of poker chips and a 42D bra and said...."Have fun."

And then I did.

I thought that Poker reminded me of Vegas and what is more fabulous than Vegas Showgirls??? So I got a few decks of cards, some ribbons, a fireman's helmet, some feathers and more rhinestones than I can count and started on some ideas. 
The sketches during brainstorming.
I wanted to use the poker chips and cards as long fringes, and create a huge showgirl headpiece to adorn the kind fireman who would wear it. 

I glued the poker chips to ribbon, and then punched holes in the cards, and glued those on too. I used poker chips glued onto the bra, and then added rhinestone's to the center of each. The cards were added to the fireman's helmut, as well as feathers, rhinestones, and a huge Ace of Spades. And of course, red fringe tassels over the nipples of the bra.


Finished piece


So much glue. And so many rhinestones.
I added about a hundred more after I took this picture.

Fireman's Helmet as Vegas Headpiece.


Here were some of the other firemen during their Catwalk.
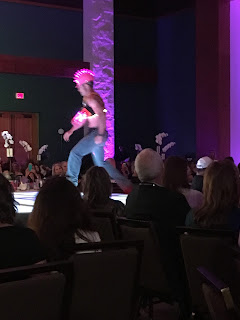


And here is the fireman, who wore mine.


Here were some of the others.

Getting dressed...... I imagine this was a strange experience for these guys. Not many men have experience wearing a bra. Or at least, a bra this heavy....;)

It was a great time. The bra I designed and made was auctioned for $2200. Some went for as much as $8000. The event made more than $50,000 that night, and all of it goes to the cancer victims and family's.

Thanks go to Selina Infante-Medina at Independence Title for sponsoring this bra. Thanks for Kendra Wray at KendraWray.com, for this opportunity. Thanks for the fireman Aaron Duval for modeling it. Thanks to Pink Heals Organization and for the Women's Council of Realtors to making this happen.

,Rudy


Thursday, October 6, 2016

Inktober 2016 10/6/2016

So, I started InkTober on October 4. A whole 4 days past the start. It takes awhile to get up motivation sometimes.

I tried to go back and do prompt's 1-3.

Prompt 1: Fast


#InkTober 2016, Fast

Prompt 2: Noisy


#InkTober 2016, Noisy

Prompt 3: Collect


#InkTober 2016, Collect

Prompt 4: Hungry

#InkTober 2016, Hungry


Of course, I'm still behind because it's October 6th. And I haven't started on 5. Sad or Prompt 6: Hidden.

Maybe I'll just start from Prompt 7. Since I finished three today. I mean, so I have less than 31 drawings. Meh. It's ok with me.

,Rudy


Tuesday, October 4, 2016

InkTober

InkTober is a creation of an artist named Jake Parker.

He started his own initiative to draw an ink drawing a day for the month of October. 31 drawings for 31 days. It became a worldwide trend with thousands of artists challenging themselves to draw more.

Here's his website detailing the project.

MrJakeParker.com

Now, I've known about InkTober for awhile. But never really tried it. I'm not saying I'll finish or even start 31 drawings for October. Well, it's the fourth so I'm three days behind anyway. But while my Goose is asleep (still) I thought I'd try a little bit. Today's prompt was "Hungry".

I had been craving chocolate cake and after buying some, and then beginning to eat it (quietly and behind their backs so they wouldn't see). My kids spied me and promptly asked me and what I was eating and if they could have some.

There is never secret cake. 

This inspired my Ink-Tober "Hungry" Ink Drawing.

My finished InkTober Drawing

I'll show a bit of the progression:

 I forgot to take a picture of the pencil sketch. They usually look better to me.


 Pen and Pencil drawing
 I tried to outline with a brush pen. It didn't look right.

 I traced over all my pen marks with a thicker marker.
 I realized I hated the little outline I did around Hungry.
 I tried to cover it up.
#Inkober, #Inktober2016

And here we are.
InkTober 2016.
Day 4.
Hungry.

It has been so long since I've drawn much. I do maybe sketch one a month. They are just sketches. Sometimes for projects, sometimes because I must draw something. But the mood doesn't happen as often as it should.

The thing about art is that you can't wait for the mood. You have to do it whether you feel like it or not. It's sort of like laundry or dishes.

Here are some links to the fantastic artists to who also contribute to InkTober

Pinterest InkTober Gallery

Till Next Time,

Rudy

Monday, October 3, 2016

butterfly swim bandana for Goose

DIY UPF swim bandana, to cover those scalps from sunburn.


We spent most of our summer swimming.  My little Goose has blonde hair, and due to a few funny cowlicks, she has a little spot on her head that you see her scalp. During the summer I was over-worried that my kids would get sunburned. My son seems to tan, and not burn much. Granted, I make him wear a UPF sun-shirt, and sunscreen. Well as much as I can slather on him while he whines and flails. The same with Goose. She will sit still longer to let me put on sunscreen. While I will spray the sunscreen in Jed.I's hair, his hair is thick enough to shield his scalp.  Goose on the other hand I was worried about after I saw her scalp get pink. You may wonder why I'm so uptight about sunburns well this is why:

1. I have burned badly in the past. As a child, as a teen and as an adult. I don't tan. I have once tried to, and got a darker shade of pale. That's it. It was boring, the burns hurt, and I didn't see much difference. I burn, I peel, then I go back to being very pale. I gave up trying to look tan. And just went with protecting myself from burns (painful) and protecting myself from the sun. I have had family members with skin cancer. I have had certain growths removed. We'll see if they grow back. (here's hoping they are just basal cell carninoma and not anything worse) While I did start taking care of my skin earlier than many, (around 18 or so) I still go in the sun everyday, here in Texas, even with sunscreen I'll get damage. If my kids inherited my skin, I need to be careful

2. Sunburns hurt. Do you know what it's like to stay up all night with your sick child? Well, when kids get sunburned they get feverish, and are in pain. You'll stay up all night trying to console and heal your child, and there's nothing you can do but give them tylenol for the pain and rub aloe on them.  I'm trying to avoid a situation where they are in pain, I'm in pain, and everyone suffers. Same reason why I make them brush their teeth. I don't want them to endure the pain of toothaches, tooth abscesses, or root canal's at 5 years old. Yes, those things do happen to children, sometimes even with good dental care. They happened to me as a child. 

So, in order to avoid all those horrible things, while still enjoying the wonderful sun we have here in Texas. I made Goose a swim bandana. Now, any old bandana might have worked. But they usually fall off her head, and I wanted something that would stay on and keep her from getting burned. 

My sister-in-law had some swim headbands for her daughter with white blonde hair that was getting her scalp burned often. But since I couldn't find one available that I liked online, and the swim hats my daughter wore just came off instantly, I decided to make one.


Here were some I found online. (Nice, but not quite what I wanted to my Goose)

UPF Scalp Cover

Nammu Swim Hat


My daughter had borrowed a very cute swim headband from my sister-in-law that was pink with purple butterflies. Just so you know, Goose tells everyone that "Pink and purple are my favorite colors!!"  I had to make a sparkly purple one with butterflies she demanded. I went to Joanns, and they had bunches of swim fabric and she picked out the sparkliest.

Mystique Perfomance Knit in Eggplant at Joann
She even picked out some butterfly appliqués. 
Butterfly Appliqué's


Next came the arduous process of figuring out how to sew on super stretch knits.

Tips for super stretch knits.

1. Use a ballpoint needle
2. Use either tissue paper, or a tear away stabilizer to sandwich stretch knit between otherwise the sewing machine will somehow manage to eat the fabric getting it horribly stuck in the strike plate
3. If you can, use a serger! I finally (really after all these years????) looked in my serger manual and learned how to do a beautiful rolled edge (that stretched beautifully) with a three threads on my serger. It looks like a baby-lok edge and it's gorgeous! 
4. Try it out on sample fabric a lot!!!

In this case, I didn't iron on the butterfly appliqué's since it would have melted off the metallic foil finish ruining the fabric and my iron. So I sewed them on. I tried by hand and those are some stiff suckers, so I used my machine to do a tack stitch. Not the serger of course, but I sandwiched the butterfly and the fabric between some tissue paper and it worked pretty well. There was some knotting of the bobbin thread, but it was to be expected occasionally.

Here is my Goose modeling it for me:

This was my first draft. I didn't think I wanted a basic swim bandana in a triangle shape. But after seeing the little cowlick of scalp that wasn't covered by the one above. I made another in a basic triangle shape. It covered more of her scalp and still stays on pretty well.


Rolled hem from my serger.
On some knits an edge seam isn't as necessary. However, since this was a very stretchy knit, and was going to be stretched a lot on the head. A finished seam is very necessary, or it will start getting runs in them just like a pair of hose. Plus, the edges wont roll which you don't want in this project. Otherwise, it would just roll off the head. :(

Till next time,
Rudy


Thursday, September 29, 2016

DIY Pokemon Ball favors and Pokémon decorations

Make your own DIY Pokèball's from bobbers, tape, and paint!


TLDR: Make Pokemon themed birthday stuff DIY for cheap from stuff you already have around the house. 


My son, Jed.i loves Pokemon. 


Before Pokemon go came out, Jed.i had been a true Pokemon fan. He loved that show, the cards, the games, we even have Pokemon monopoly.  The last week of school he informed me that he HAD to give out invitations to his birthday party at school. His birthday wasn't until the next school year, two days in to in exactly. So, I wasn't sure it would work, because that was three months away. But, I did as he asked, and after agreeing he needed a Pokemon (not Minecraft) themed birthday, well, I started planning. 

I had no pin the tail on the donkey, no cute pikachu napkins or plates. No pokemon themed anything. So, here were some ideas I had.


Pokemon go had just come out a few weeks before his birthday. It was huge. It took over everything. And although, everything was about Pokemon, there weren't any party supplies out yet. So, seeing as I can't sit still I had to come up with some party decorations and favors. 
The Pokeball favors. I started them with bobbers, I didn't have any fishing bobbers, but I bought some at a sporting goods store for like.....$10. I had like, 35 in various sizes. 


1.Cut off the bobber hook. (use wire cutters, not your fabric scissors.)
Push the red (sticky outy thing) like you were going to wrap the fishing line around the hook. 

What comes out when you cut the wire.

Cut some black electrical tape, you can cut the strip narrower for the size ball you have.

Wrap electrical tape around the middle. 


Color a circle with a sharpie. on the center of the ball, overlapping the black tape.

Dap a little white paint on the black circle with a q-tip.

All directions together:
1.Cut off the bobber hook. (use wire cutters, not your fabric scissors.)
Push the red (sticky outy thing) like you were going to wrap the fishing line around the hook. 
2. Wrap black electrical tape around the center.
3. Use a sharpie to color in a circle of black. 
4. Dab a bit of white paint in the middle. 

Voila, you have a poke-ball favor. 

Repeat as much as you like.


Gotta catch them all. I found, that although the electrical tape gives a nice line, it falls off. So, if you were inclined, you could use the sharpie to follow the seam on the bobber, and eliminate the black electrical tape completely. Or use black duck-tape (they have narrower rolls) to keep the tape from coming off. Or let me know if you find a better black tape. 

NOTE: I used these as favors, as in a game called, "Gotta catch them all!" Its a modified pin the tail on the donkey. Instead of spinning and pinning the tail blindfolded. I gave each kid 5 Pokéballs (that I made) I spun them around, and then had them throw the ball at five different Pokèmon posters. If they hit a Pokemon they got a piece of candy. It was fun, but we did it outside (because some seven year old's have some serious pitching arms) and the Pokéballs started to shatter after they hit the concrete. 

You could try painting some wiffle balls, or some ping pong balls, or hey, even rubber bounce balls. 

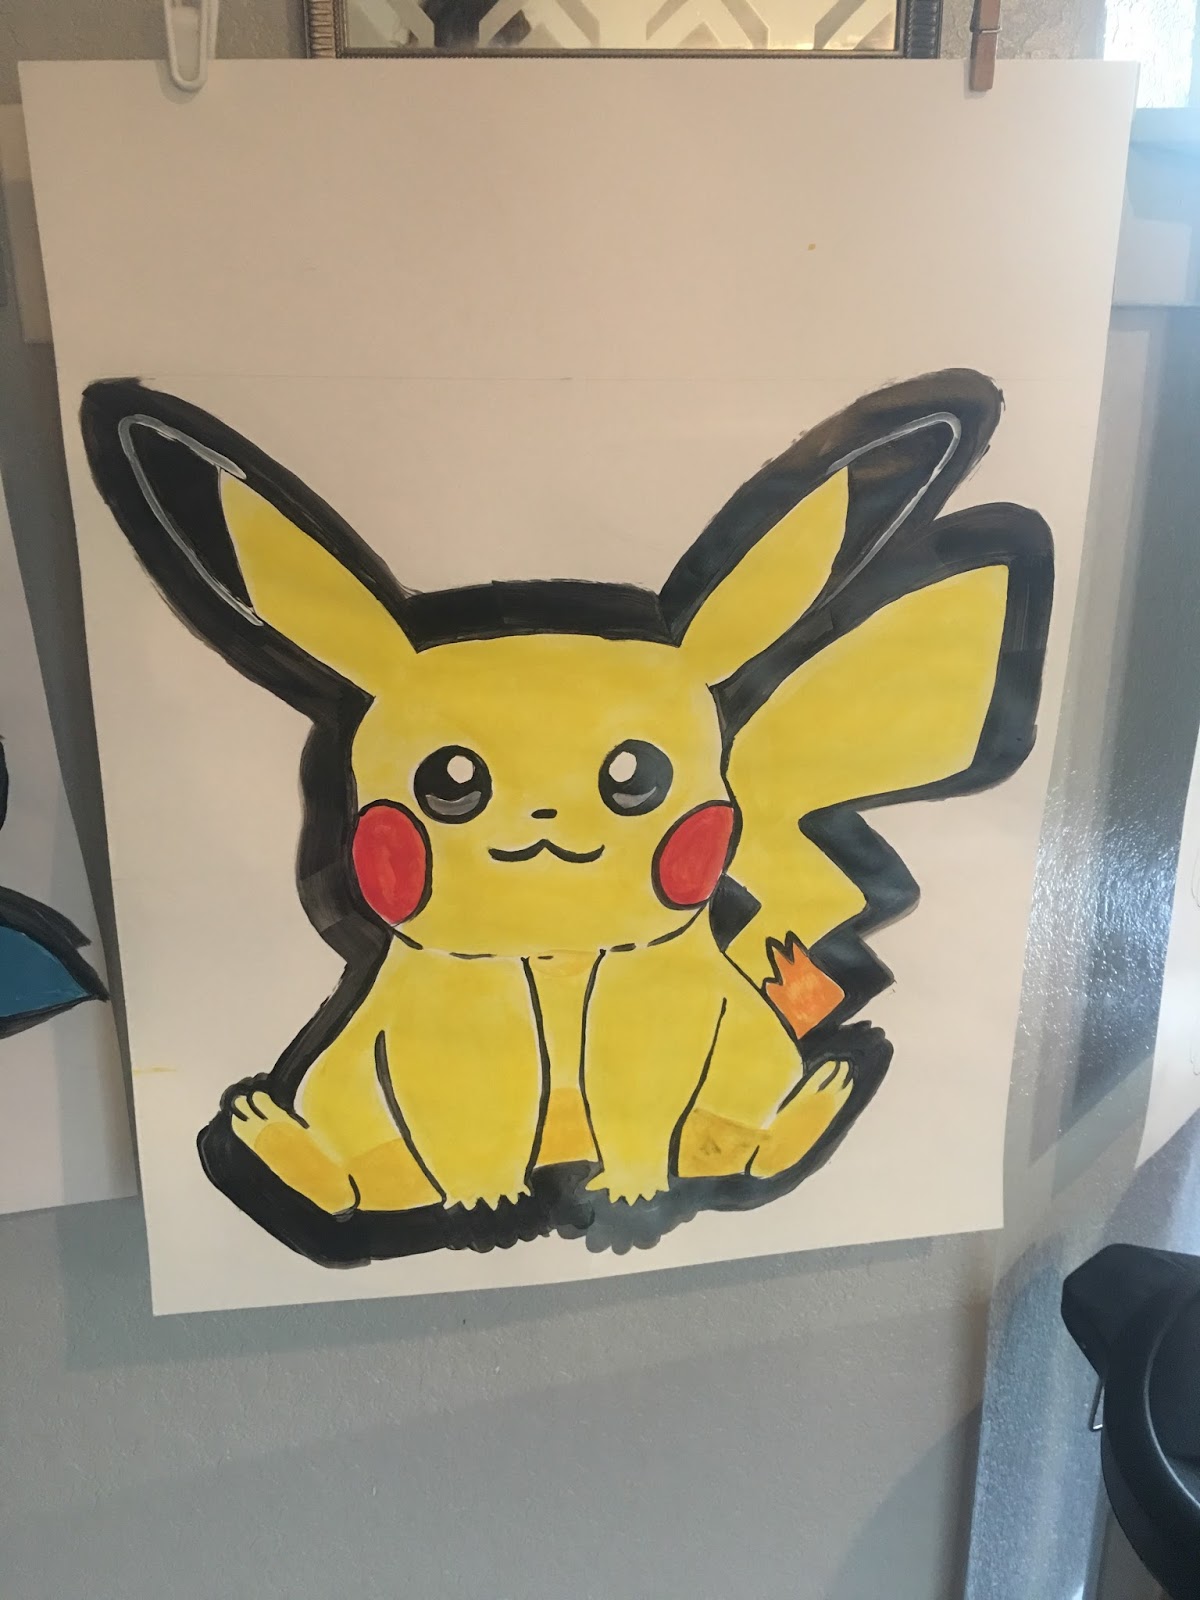
Here I'm starting to paint some posters of Pokémon to use for the party.
Pikáchu, I printed out some pics, and just drew a grid on the print out. I drew a corresponding grid on my posters and started to paint. 

Note, painting with poster paint is horrible. Just get the craft acrylic paint. And don't try to mix your paint. Especially if you have no palette knife, no palette, and there's a $1 bottle of premixed paint the perfect color at an art store. This isn't painting class guys. 

Pikáchu and Squirtle


This was a much more time consuming project than I expected. And more frustrating since my kids BEGGED to help. And then I had to FINISH their work. Or really, re-paint it.


DIY pokèmon cupcakes. 
Just white icing dipped in red sprinkles, chocolate icing covered with chocolate chips, and white iced cupcakes arranged to look like a Pokéball.

Before I set them up outside, they were the decorations!! 

It was a smashing success. Everybody had a great time. And I was exhausted!!!

,Ruth